Web example: Configuring a time range
Network configuration
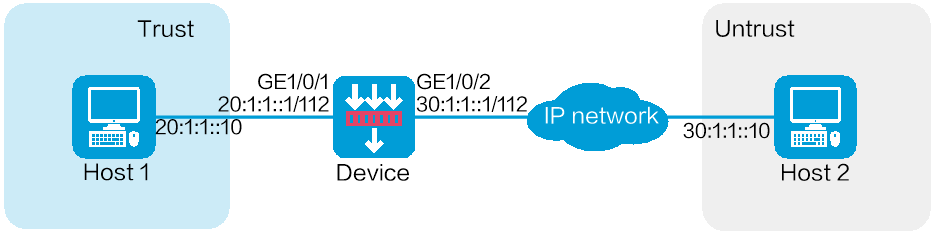
As shown in Figure-1, configure a service object group on the device to allow Host 1 to communicate with Host 2 through ICMPv6 in a specific time period.
Software versions used
This configuration example was created and verified on E9900 of the F5000-AI-55-G device.
Restrictions and guidelines
When you configure object groups, follow these restrictions and guidelines:
If the specified peer host name is resolved by the DNS server, the local end will query the DNS server for the latest IP address corresponding to the host name after the domain resolution validity period notified by the DNS server expires. If the specified peer host name is resolved by locally configured static domain name resolution, after you change the IP address corresponding to this host name, you must re-specify the peer host name in the IPsec policy for the local end to resolve to the updated peer IP address.
To ensure the successful establishment of an SA on IPsec peers, make sure the ACL configurations used for IPsec on both ends are mirror-symmetrical. This means that the source and destination of the data flows to be protected must be as symmetrical as possible on both ends. If the ACL configurations on the IPsec peers are not mirror-symmetrical, then negotiation can only succeed if the range defined by the ACL rules on one end is a subset of the range on the other end, and only when the end with the smaller protection range initiates the negotiation with the end with the larger protection range.
If a local identity is not configured under the IPsec policy, the global local identity from the advanced configuration will be used by default.
You can modify the IPsec security proposal as needed. However, these modifications do not affect IPsec SAs that have already been successfully negotiated. The original security proposal will continue to be used for existing SAs, and only newly negotiated SAs will use the updated security proposal. To apply the modifications to already established IPsec SAs, you must first clear the existing SAs.
On both ends of an IPsec tunnel, the encapsulation mode used in the IPsec security proposal must be consistent.
When an IKE negotiates an IPsec SA, if the IPsec SA lifetime is not configured under the IPsec policy on the interface, the global IPsec SA lifetime will be used for negotiation with the peer. If the IPsec SA lifetime is configured under the IPsec policy, the configured value in the policy will be given priority for negotiation with the peer.
When an IKE negotiates the establishment of an IPsec SA, it uses the shorter lifetime between the locally configured IPsec SA lifetime and the lifetime proposed by the peer.
Procedure
Assign IPv6 addresses to interfaces and add the interfaces to security zones.
# On the top navigation bar, click
Network .# From the navigation pane, select
Interface Configuration >Interfaces .# Click the
Edit icon for GE 1/0/1.# In the dialog box that opens, configure the interface:
Select the
T rust security zone.On the
IP v6 Address tab, enter the IP address and mask of the interface. In this example, enter 20:1:1::1/112.Click OK.
# Add GE 1/0/2 to the
Unt rust security zone and set its IP address to 30:1:1::1/112 in the same way you configure GE 1/0/1.Create a service object group.
# On the top navigation bar, click
Objects .# From the navigation pane, select
Object Groups >Service Object Groups .# Click
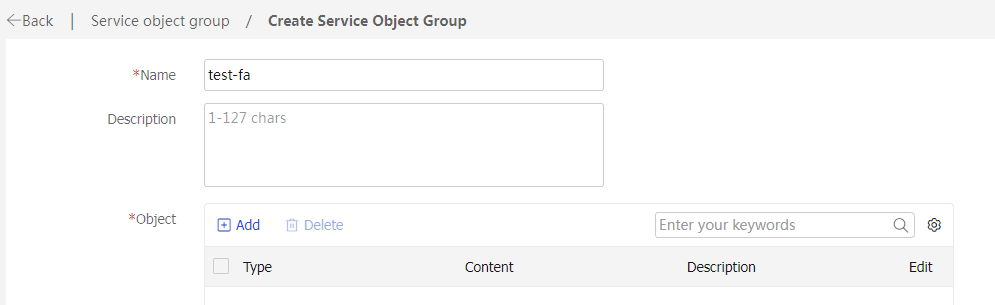
Create .# In the dialog box that opens, configure the service object group:
Enter a group name. In this example, enter
test- fa .Click
Add .Figure-2 Create a service object group
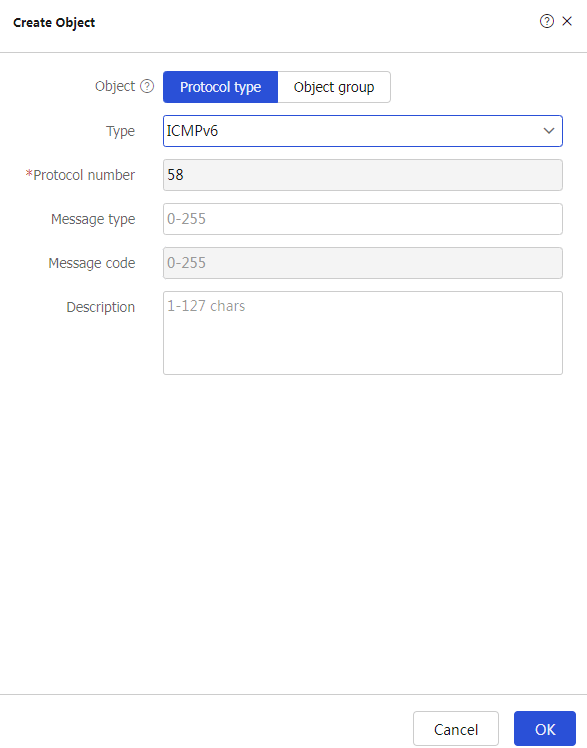
In the dialog box that opens, configure a service object.
Select object
Protocol name .Select type
ICMPv6 .
Click
OK .Figure-3 Create an object
On the
Create Service Object Group page, clickOK .
Create a time range.
# On the top navigation bar, click
Object .# From the navigation pane, select Object Groups > Time Ranges.
# Click Create.
# In the dialog box that appears, enter name
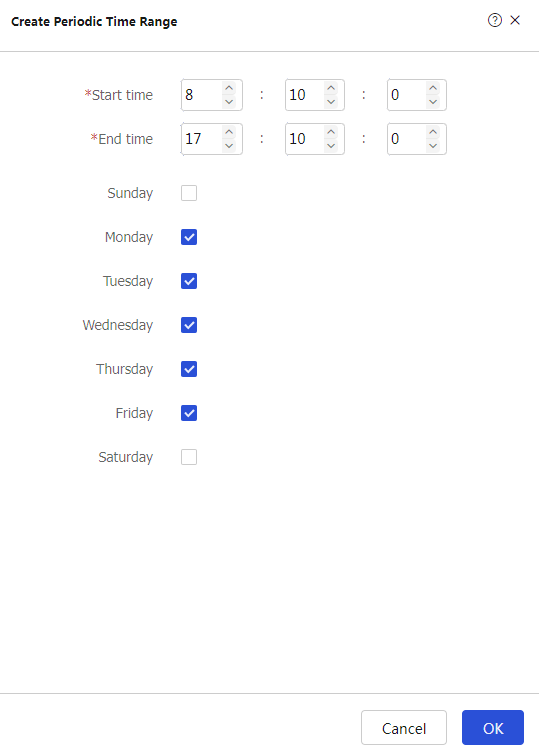
test- time and then clickCreate forPeriodic time range .# In the dialog box that appears, configure the time range:
Set the start time to
08:10 .Set the end time to
17:10 .Select
Monday ,Tuesday ,Wednesday ,Thursday , andFriday .
Figure-4 Configure a time range
# In the
Create Time Range page, clickOK .Create a security policy from zone
Tr ust to zoneUnt rust .# On the top navigation bar, click
Policies .# From the navigation pane, select Security Policies > Security Policies.
# Click Create.
# In the dialog box that appears, configure a security policy:
Enter policy name
test- time .Select source zone
T rust .Select destination zone
Unt rust .Select type
IPv 6 .Select action
Permit .Select service
test- fa .Select time range
test-time .
# Click
OK .
Verifying the configuration
# Verify that you can ping Host 2 from Host 1 successfully in the time period specified by the time range.
C:\Users\abc>
Pinging 30.1.1.10 with 32 bytes of data:
Reply from 30.1.1.10: bytes=32 time<1ms TTL=254
Reply from 30.1.1.10: bytes=32 time<1ms TTL=254
Reply from 30.1.1.10: bytes=32 time<1ms TTL=254
Reply from 30.1.1.10: bytes=32 time<1ms TTL=254
Ping statistics for 30.1.1.10:
Packets: Sent = 4, Received = 4, Lost = 0 (0% loss),
Approximate round trip times in milli-seconds:
Minimum = 0ms, Maximum = 0ms, Average = 0ms
# Verify that you cannot ping Host 2 from Host 1 and the corresponding session does not exist at any time beyond the time period specified by the time range.